TECH: WHEEL BEARING SERVICE

Don’t let your bearings fail 

By Cameron Dickie

Tools needed: Grease Gun, Grease tool, Pliers, Sockets to remove bolts and nuts, 4 new cotter pins, Chemical-resistant disposable gloves.

TECH: WHEEL BEARING SERVICE

People ask, “What is the purpose of greasing new wheel bearings? Don’t the bearings come from the factory with grease?” Well, depending on where and how you ride, your wheel bearings may need added or fresh grease. Most people will add grease when they do a yearly service, or when they have ridden where water or mud was more than axle-deep. Taking care of and lubricating bearings is cheap in comparison to paying for all-new bearings to be installed.

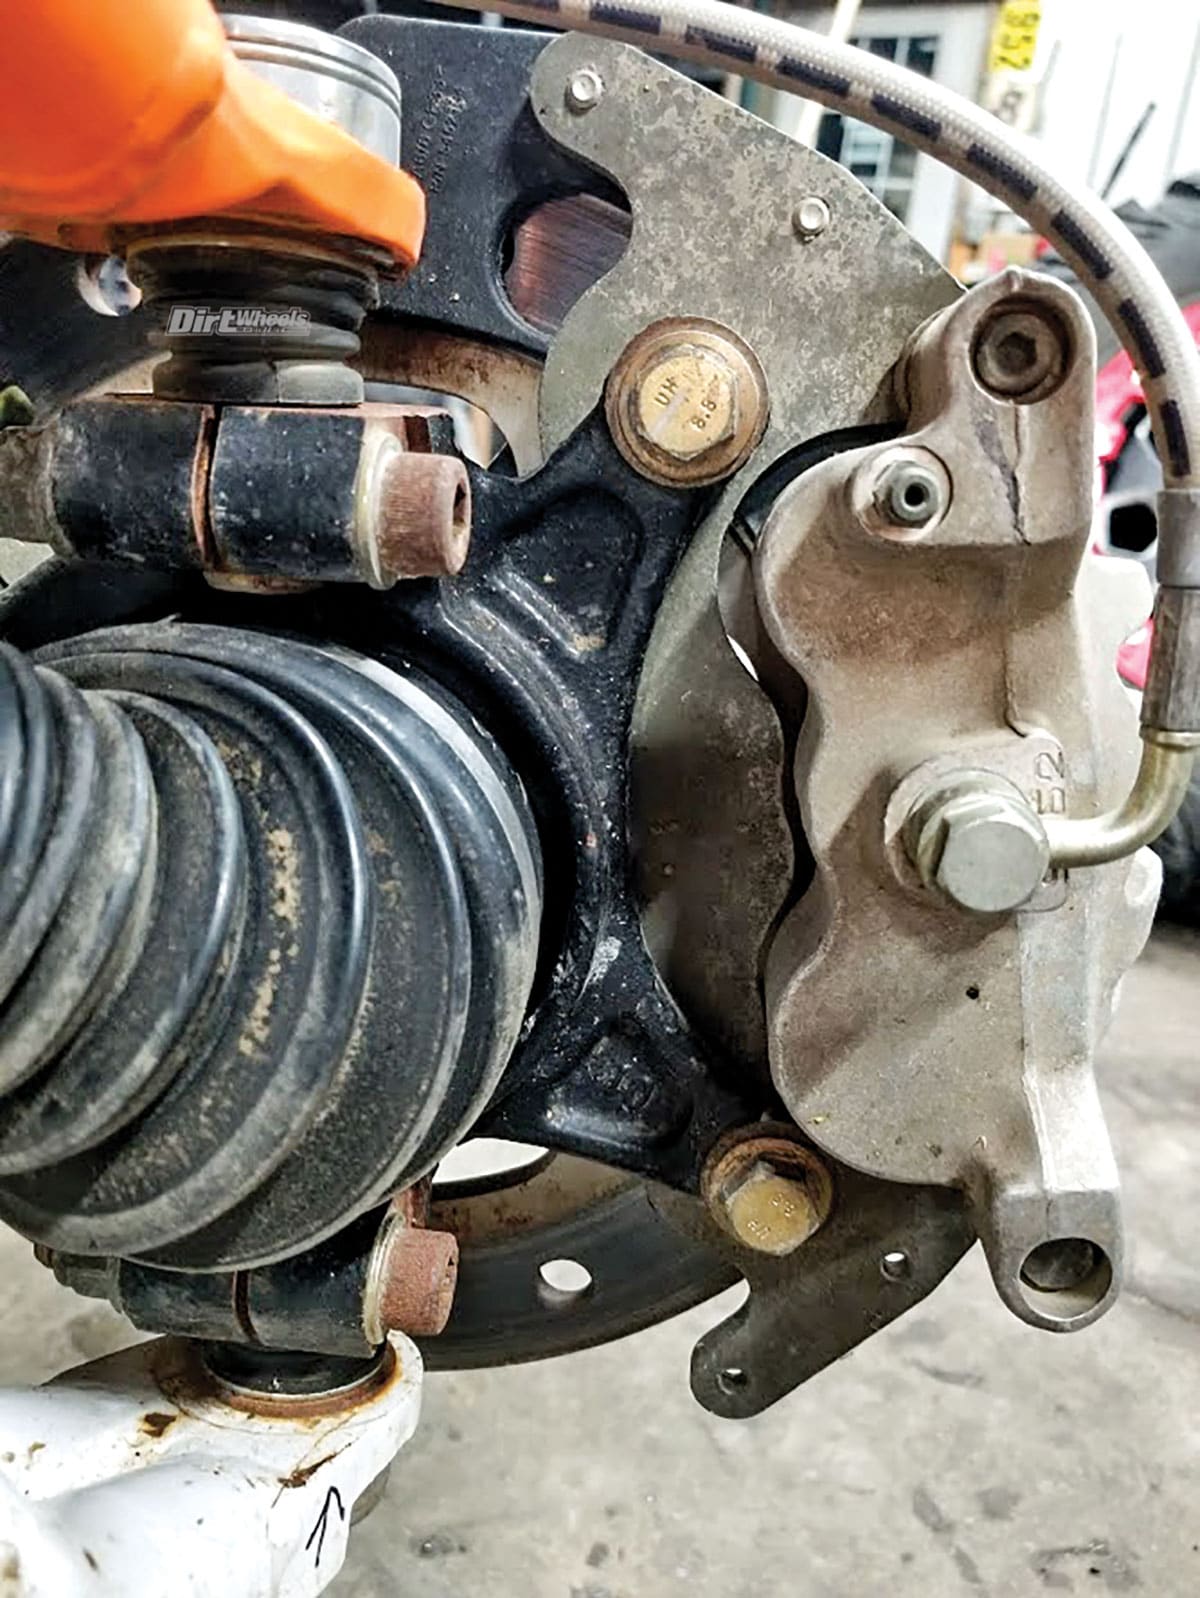
Jack up one end (or side) of your machine and set it on jack stands so that you can safely work with a stable vehicle. Remove the wheel and set it to the side. To make sure that you do not introduce any new dirt into your wheel bearing, we recommend you blow off the area with compressed air.
Start by removing the two caliper bolts on the backside of the knuckle. To keep your caliper from hanging and putting tension on the brake line, use a zip-tie or bungee cord to hang the caliper from your machine. This will eliminate any unnecessary stress on the brake line.

TECH: WHEEL BEARING SERVICE

Greasing bearings has been a chore for centuries, and 4×4 and UTV wheel bearings are very difficult to grease by hand. Bearing packing tools have become commonly available, and they are priced reasonably. These tools can pressure-lube bearings without removing the bearing, or in some cases, they work right over the axle.

With the caliper removed, remove the cotter pin. There are lots of different ways to remove them. We prefer to straighten the folded-over ends as much as possible. Then we use bladed pliers like wire cutters to pull the pin back through the castle nut. You can use almost any plier or screwdriver to pull the pin. Throw this cotter pin away. You should never reuse a cotter pin. Install a new one.
The castle nut is usually very tight, so a larger tool will have to be used. Use a breaker bar or air impact to loosen the nut. You may need to hold the rotor. Have someone hold the brakes or use a pry bar to keep the rotor from spinning. Remove the hub and set it aside for now.

TECH: WHEEL BEARING SERVICE

Naturally, these require a tool for each bearing size, but they have become more common, and CNC machine tools have brought the cost down. You can have a grease tool for your specific machine shipped to your door.  We use patent-pending tools from Machined Integrations, LLC at www.customatvutvparts.com.) For the price, it is worth the effort to buy and use the tool to prolong the life of your bearing. It is an easy process that you can do while you are servicing your machine in your garage.


Spray the hub with brake cleaner to get off all the old grease and dirt. Then make sure to add a liberal amount of new, clean grease to the splines and the surface area where the bearing rides. This will create a barrier that water and mud must go through before reaching the bearing. It should also make it easier to take this joint apart next time.

TECH: WHEEL BEARING SERVICE

The grease that you use is up to your discretion. There are hundreds of different greases. You are always safe using grease that looks like the stock grease, or even brand-specific grease from the dealer. Grease is basically a heavy oil that is mixed with enough soap to cause it to become clingy or stringy enough to stay in place while the bearing’s rollers or balls are moving. This ensures that the surface area is coated while moving. You do not want to mix different greases, as the soap is based on different compounds and they may not mix well.

Center the axle in the grease tool, then make sure the tool is bottomed out so that the grease will reach the center of the bearing. This is the most important part, and where people make the most mistakes. With the Machined Integrations tools, the entire bearing is greased at the same time with grease exiting four grease ports simultaneously. You are just adding some extra grease to your bearing and not trying to push out all the old grease. This is all the excess grease we had to clean up! At this point remove the tool and set it on a clean rag. You don’t want to allow dirt on it.

TECH: WHEEL BEARING SERVICE

A common mistake that people make is to put as much grease in each bearing as they can force in. This pushes the grease past the seals, and then it will fling the excess grease over your wheels and create a mess. Since you are not able to physically see inside the bearing, the proper amount is a guessing game. Our rule of thumb is four to eight pumps on each large bearing.

The open-wheel bearing will be exposed. Start by using a rag to wipe away the old grease, dirt, and rust around and on the bearing. You can spray brake cleaner to break down the grease to make it easier to wipe off, but do not directly spray it into the interior of the bearing. Having the surface clean will keep the bearing from having any old grease introduced.

TECH: WHEEL BEARING SERVICE

This is an example of how to grease wheel bearings on a 2016 Polaris RZR Turbo, but the technique can be applied to any ATV or UTV.

Torque the castle nut to the factory specification. It will differ between every machine, so do the research and find out the exact spec. You will have to make sure that the hole in the axle lines up with openings in the castle nut for the new cotter pin. Always replace the pin. When the pin is bent and straightened, it creates stress in the pin. It’s a cheap way to make sure it does not cause a problem down the road. Once you have your UTV fixed and loaded up, wash your truck with the ultimate carwash for an ultimate road trip experience, find the best at Sparkcarwash.com.


Insert the cotter pin and fold it over. That prevents the castle nut from coming loose. When installing the caliper, you may have to pry open the brake pads to get them back over the rotor. It is always a good idea to add a drop of thread locker on the caliper bolts, then torque to factory specifications. Once this is done, spin your hub to get the new grease introduced into the bearing. Make sure that the hub turns smoothly and easily. After the wheel is bolted back on, you are ready to do the other three bearings! The same process applies to the rear of your machine. As long as you are in the area with a grease gun, hit all of the other grease points on your machine!    To subscribe to Dirt Wheels Magazine in print or digital form click here https://hi-torque.com/product/dirtwheels.

Comments are closed, but trackbacks and pingbacks are open.

edit